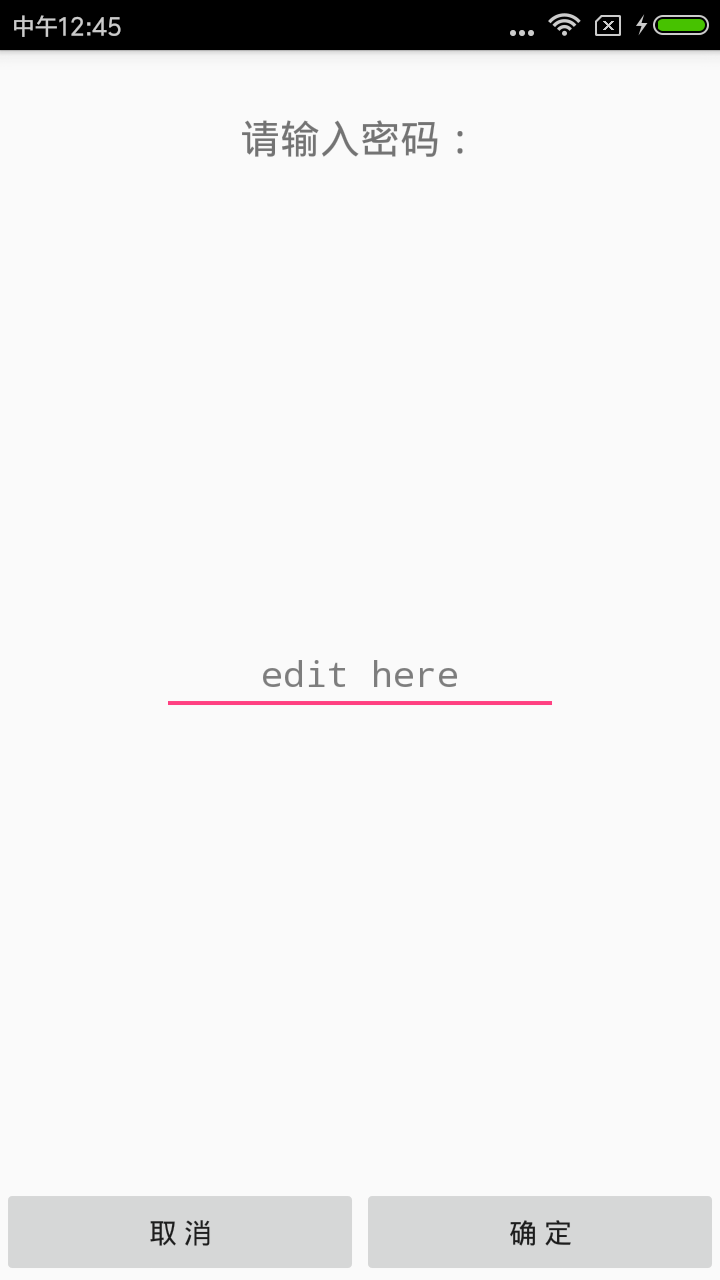
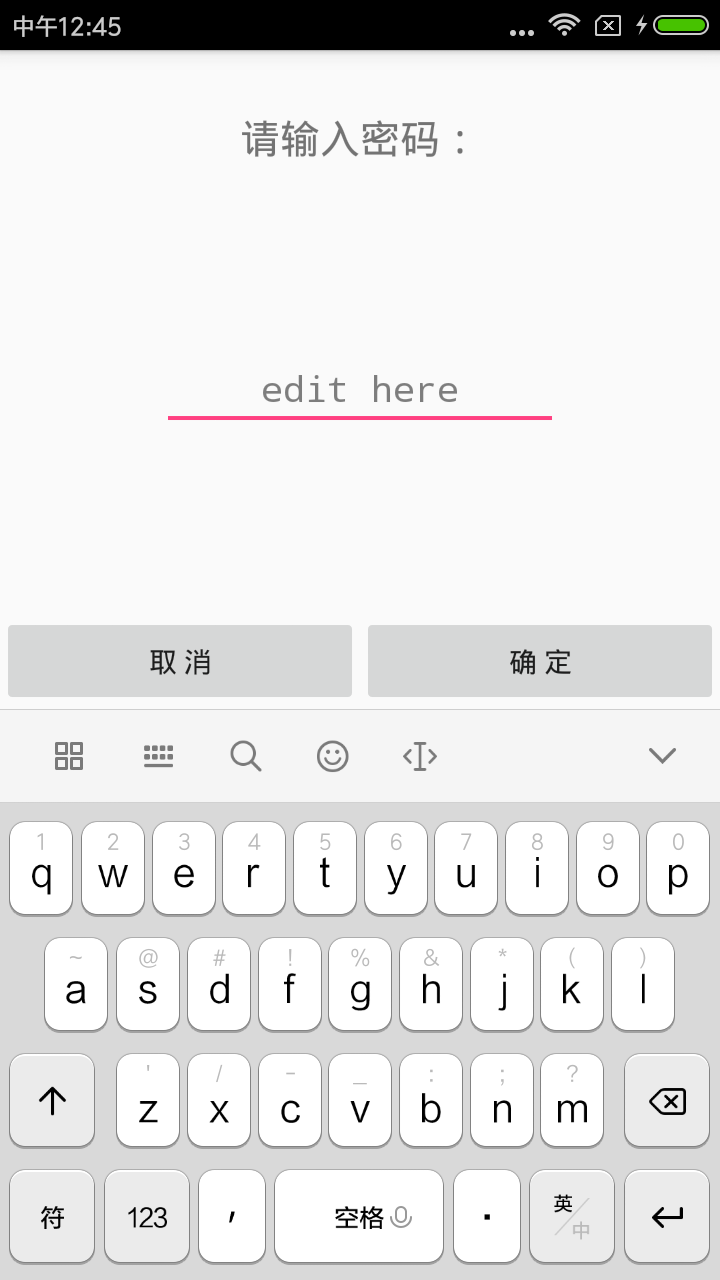
今天在给手机设置PIN码时,发现在设置PIN码的页面,输入框和底部的按钮会随着输入法的弹出而上移,从而不至于被输入法挡住。
这样的布局是怎么实现的呢?经过尝试,我也实现了同样的效果。下面来进行分析。
先分别看下输入法未弹出和弹出后的效果:


下面看具体实现:
<?xml version="1.0" encoding="utf-8"?><LinearLayout xmlns:android="http://schemas.android.com/apk/res/android"
    android:layout_width="match_parent"
    android:layout_height="match_parent"
    android:orientation="vertical">

    <TextView        android:layout_width="match_parent"
        android:layout_height="wrap_content"
        android:gravity="center"
        android:textSize="20sp"
        android:paddingTop="30dp"
        android:text="请输入密码:"/>

    <LinearLayout        android:layout_width="match_parent"
        android:layout_height="0dp"
        android:layout_weight="1"
        android:orientation="vertical"
        android:gravity="center_vertical">

        <ScrollView            android:layout_width="match_parent"
            android:layout_height="wrap_content">

            <EditText                android:id="@+id/gridview"
                android:layout_width="200dp"
                android:layout_height="wrap_content"
                android:layout_gravity="center_horizontal"
                android:hint="edit here"
                android:inputType="textPassword"
                android:gravity="center"/>

        </ScrollView>
    </LinearLayout>

    <LinearLayout        android:layout_width="match_parent"
        android:layout_height="wrap_content"
        android:orientation="horizontal"
        android:dividerPadding="10dp">

        <Button            android:id="@+id/smit_btn"
            android:layout_width="match_parent"
            android:layout_height="wrap_content"
            android:layout_weight="1"
            android:text="取 消" />

        <Button            android:id="@+id/cancel_btn"
            android:layout_width="match_parent"
            android:layout_height="wrap_content"
            android:layout_weight="1"
            android:text="确 定" />"    </LinearLayout></LinearLayout>1234567891011121314151617181920212223242526272829303132333435363738394041424344454647484950515253545556575859
整个布局由三部分组成:
顶部是一个TextView,文字为“请输入密码”,底部是一个Linearlayout,包含两个Button。这两部分的高度是固定的。
其余部分是一个Linearlayout,高度为0dp并且其layout_weight为1,这个属性是一个关键,表示这个Linearlayout将会填充除了其余两部分之外的所有屏幕空间。在这个Linearlayout里,输入框被一个ScrollView包含,这个ScrollView是另一个关键,如果不用ScrollView的话,中间部分就不会上移,输入法弹出后就会遮挡底部按钮。
注意
经过测试,下面几种情况下,这样布局上移的效果会失效:
1.在Manifest里给activity加上android:windowSoftInputMode=”adjustPan”这样的属性。
2.实现了沉浸式状态栏,比如在setContentView之前加上这些:
if (Build.VERSION.SDK_INT >= Build.VERSION_CODES.KITKAT) {
    getWindow().addFlags(WindowManager.LayoutParams.FLAG_TRANSLUCENT_STATUS);
    getWindow().addFlags(WindowManager.LayoutParams.FLAG_TRANSLUCENT_NAVIGATION);}1234
那如果要实现沉浸式状态栏又要保持布局不会被输入法遮挡,怎么办呢?
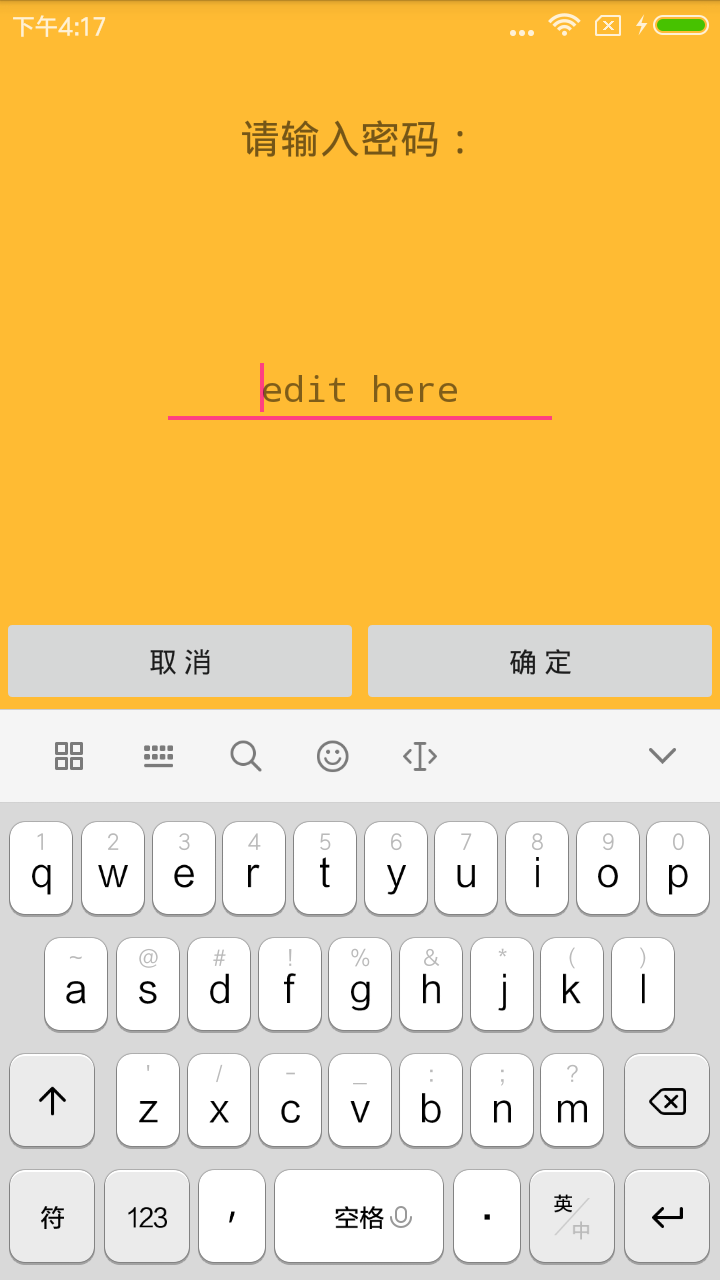
只要在根布局加上android:fitsSystemWindows=”true”即可,效果如下(为方便看效果我把背景改成了黄色):


