官方教程
https://docs.gitlab.com/omnibus/docker/
建议虚拟机内存2G以上
搜索镜像
docker search gitlab
下载镜像文件
docker pull docker.io/gitlab/gitlab-ce
注意:一定要配置阿里云的加速镜像
创建GitLab 的配置 (etc) 、 日志 (log) 、数据 (data) 放到容器之外, 便于日后升级, 因此请先准备这三个目录。
mkdir -p /mnt/gitlab/etc
mkdir -p /mnt/gitlab/log
mkdir -p /mnt/gitlab/data
创建容器之前,我们先关闭下防火墙,重启docker服务
systemctl stop firewalld.service
firewall-cmd --state
systemctl daemon-reload
systemctl stop firewalld.service
运行GitLab容器

docker run \--detach \--publish 2222:22 \--publish 8090:80 \--publish 8443:443 \--hostname 192.168.56.3 \-v /mnt/gitlab/etc:/etc/gitlab \-v /mnt/gitlab/log:/var/log/gitlab \-v /mnt/gitlab/data:/var/opt/gitla \-v /etc/localtime:/etc/localtime:ro \--name gitlab \--restart always \--privileged=true gitlab/gitlab-ce:latest
运行成功之后,将挂载文件同步到容器外面
修改/mnt/gitlab/etc/gitlab.rb
把external_url改成部署机器的域名或者IP地址
vi /mnt/gitlab/etc/gitlab.rb
external_url 'http://192.168.56.3'
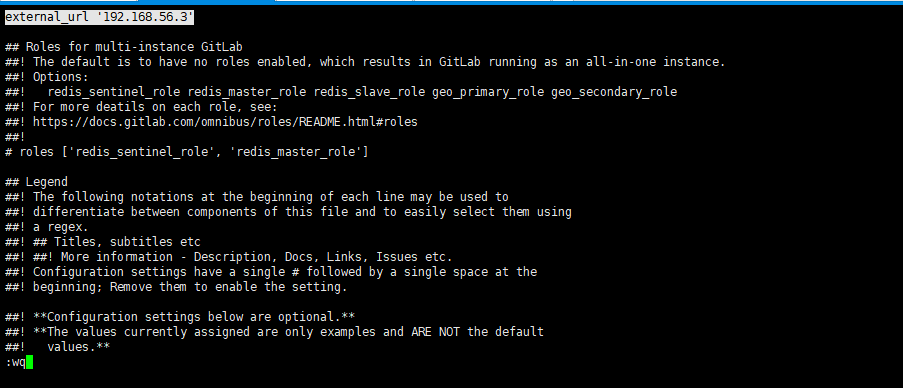
按 i 进行编辑,编辑好了按Esc,:wq 进行保存
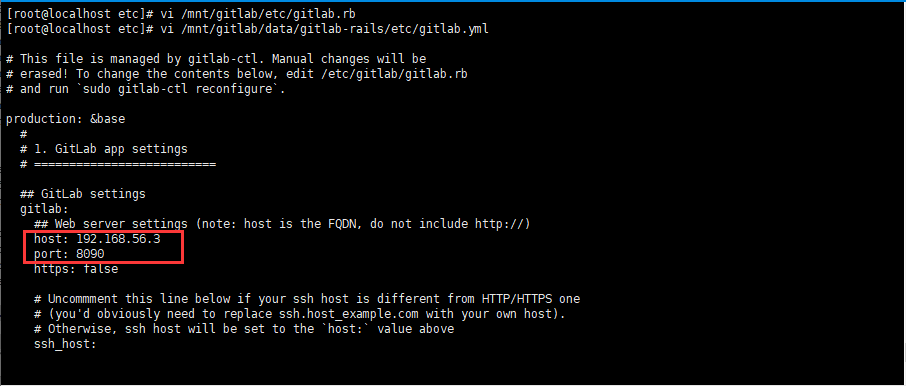
修改/mnt/gitlab/data/gitlab-rails/etc/gitlab.yml
vi /mnt/gitlab/data/gitlab-rails/etc/gitlab.yml
找到关键字 * ## Web server settings *
按斜杠进行搜索
/Web server settings
我们进到目录再看一下挂载文件是否同步到外面来了
[root@localhost ~]# cd /mnt/gitlab/etc/[root@localhost etc]# ls
gitlab.rb            ssh_host_ecdsa_key      ssh_host_ed25519_key      ssh_host_rsa_key      trusted-certs
gitlab-secrets.json  ssh_host_ecdsa_key.pub  ssh_host_ed25519_key.pub  ssh_host_rsa_key.pub
这个时候我们把容器停止再删除,然后重启服务
[root@localhost ~]# docker stop 3f3d49ac7888aaf51d51761c27f92e4bf1b465f76b1a58f3428637b9c3ffd9b7
3f3d49ac7888aaf51d51761c27f92e4bf1b465f76b1a58f3428637b9c3ffd9b7
[root@localhost ~]# docker rm 3f3d49ac7888aaf51d51761c27f92e4bf1b465f76b1a58f3428637b9c3ffd9b7
3f3d49ac7888aaf51d51761c27f92e4bf1b465f76b1a58f3428637b9c3ffd9b7
[root@localhost ~]# systemctl restart docker
[root@localhost ~]#
再来重新创建容器
docker run \
--detach \
--publish 2222:22 \
--publish 8090:80 \
--publish 8443:443 \
--hostname 192.168.56.3 \
-v /mnt/gitlab/etc:/etc/gitlab \
-v /mnt/gitlab/log:/var/log/gitlab \
-v /mnt/gitlab/data:/var/opt/gitla \
-v /etc/localtime:/etc/localtime:ro \
--name gitlab \
--restart always \
--privileged=true gitlab/gitlab-ce:latest
这个时候我们来查一下,看一下容器有没有分配ip地址,有的话表示创建容器成功了。
[root@localhost ~]# docker ps
CONTAINER ID        IMAGE                           COMMAND                  CREATED              STATUS              PORTS                                                 NAMES
d07898b3749d        gitlab/gitlab-ce                "/assets/wrapper"        About a minute ago   Up Less than a second (health: starting)   22/tcp, 0.0.0.0:8090->80/tcp, 0.0.0.0:8443->443/tcp   gitlab
f264e5f1be41        sonatype/nexus3                 "sh -c ${SONATYPE_DI…"   2 hours ago          Up 2 hours              0.0.0.0:8081->8081/tcp                                nexus
[root@localhost ~]# docker inspect d07898b3749d
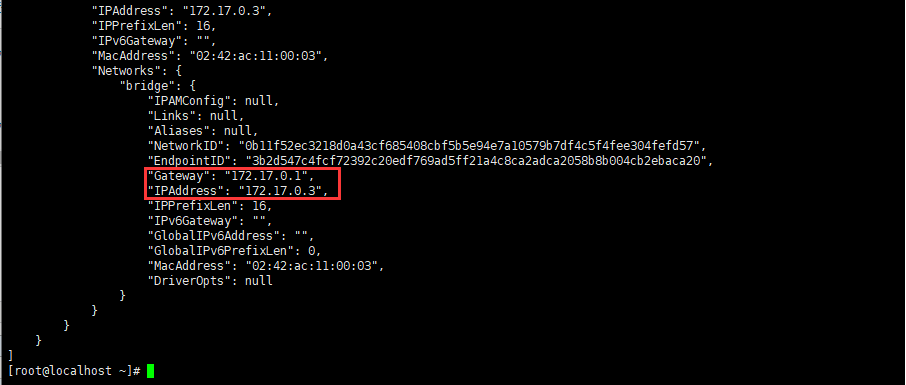
访问一下ip地址
[root@localhost ~]# curl 172.17.0.3:80
curl: (7) Failed connect to 172.17.0.3:80; Connection refused
拒绝连接,说明启动没有那么快,还需要一些时间
关闭防火墙,查看下状态,这个时候防火墙已经关闭了。
[root@localhost ~]# systemctl stop firewalld.service
[root@localhost ~]# firewall-cmd --state
not running
[root@localhost ~]#
查看了下容器状态,发现gitlab一直是重启状态
[root@localhost ~]# docker ps
CONTAINER ID        IMAGE                           COMMAND                  CREATED             STATUSPORTS                    NAMES
d07898b3749d        gitlab/gitlab-ce:latest   "/assets/wrapper"        19 minutes ago      Restarting (1) 1 second ago    gitlab
查看日志
sudo docker logs gitlab
错误就不在这里演示了,通过谷歌解决了我的问题,
解决好之后重启下服务跟gitlab
重新验证,好了

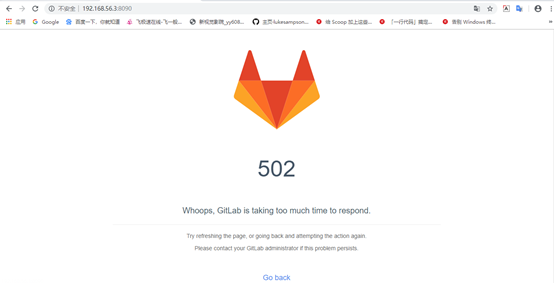
等个几分钟,重新刷新下页面
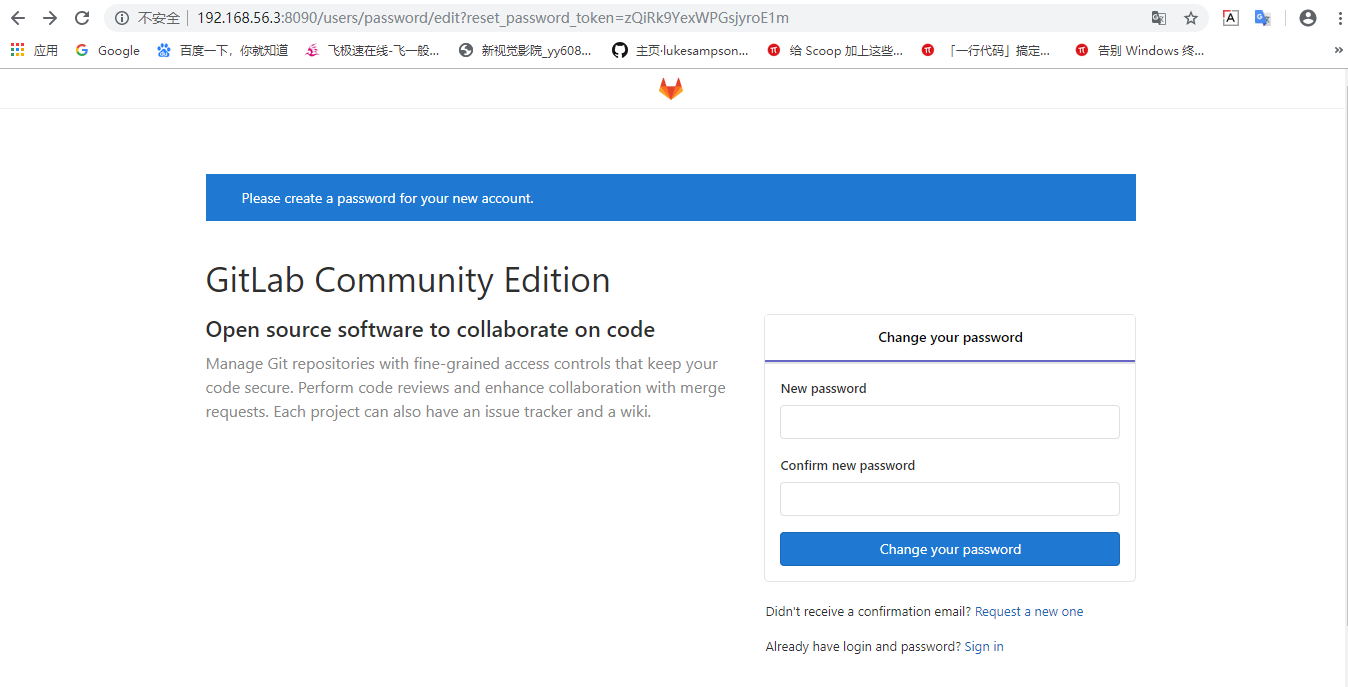
至此gitlab搭建成功了,历经千辛万苦